I began searching blogland to get some ideas. I kept seeing birthday crowns made out of felt. They were really cute, but they would only be appropriate for the actual birthday boy to wear. Check out these great ideas from Skip to My Lou and One Crafty Place.
Somehow I came up with the idea to make "Dinosaur Crowns" for everyone (in keeping with our dinosaur theme for the birthday party).

It's a great project because it's easy and cheap (25 cents for 1 sheet of craft felt which yields 2 crowns; $1.29 for 1 yard of elastic which yields 3 crowns; fusible webbing-I had some left over from my T-shirt Quilt project, but it's sold by the yard and very inexpensive). It's great too, because felt comes in so many different colors, I can make one to suit every kid at the party (boy or girl). Felt is quickly becoming one of my favorite fabrics to work with!
So here's how I did it. First of all, find an image that you want to use. I actually went to PBS Kids and found a picture of a Stegosaurus that I just simplified. Cut out your "pattern".
Next, cut out your fusible webbing to the size of your felt and iron it on (again, I was using leftover webbing so I had to piece 2 pieces together to cover my felt). Iron according to the directions on your webbing (I ironed on the webbing side, on the "cotton" setting). I used lightweight webbing because I had it leftover, but it seems like most people recommend a heavier webbing. I think the lightweight one was fine because the "crown" doesn't stand up too high.

Now trace your pattern on to the webbing.

And cut it out.

Cut a 10"-12" piece of elastic (I used 3/4") and pin about 1" onto either side of your dinosaur.

Finally, using your sewing machine, stitch around the crown, making sure the elastic gets stitched to the dinosaur. I used contrasting thread in a straight stitch. You could get creative and use a different stitch, or play with the thread colors. Since I'm probably going to have to make 20 of these, I decided to keep it simple.

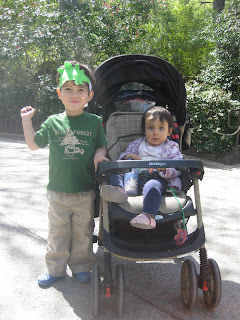
My son's birthday party is not for a few weeks, but I asked him to try on the crown this morning just to check the size of it. He loved it so much, he insisted on wearing it the zoo!

Now I just hope all the other kids at the birthday party love it as much!
Linked to:


I love that hat...what an easy treat. i am sure all the kiddos willl wear them.
ReplyDeleteWhat a really cute idea for a birthday party. The kids will love them. Have a great Wed...julie
ReplyDeleteYou found the perfect one! AND in the way you made it, it can be worn every time he wants to go dinosaur hunting. Thank you for linking to the Boardwalk Bragfest. Great Project!
ReplyDeleteI remember having a dinosaur party with my baby boy, now 17, this would have been a great addition. Lezlee
ReplyDeleteHow delightfully simple. Thanks for sharing!
ReplyDeleteThat's so cute ... my little guy would love one!
ReplyDeleteThanks for stopping by Our Journey and checking out my Travel Felt Mat!
ReplyDeleteI enjoyed checking out your blog and am your newest follower!
I checked out your Travel Distractions post ... and got quite a kick out of it! I also travel with a homemade I Spy book filled with pictures of my sons toys ... and an I Spy bag! We have very similar tastes ... I just haven't gotten around to posting all my little travel creations!! :o)
I look forward to keeping up with your blog!
I love the idea behind your blog. Sometimes we get so wrapped up in life that we forget to be present. I try to make an effort to live this way. It is important.
ReplyDeleteHappy SITS Sharefest!
Great idea. I was trying to think of what to make as a party favor for my little girl's party. I was thinking of a foam butterfly with stuff for the kid to decorate at home. Maybe I'll see if I can sew the foam cut-outs to elastic to make crowns.
ReplyDeleteThanks for the inspiration
Great idea! What kid wouldn't love this?!! Thanks for linking up at my link party!!
ReplyDeleteThat is so ADORABLE!! I can totally see that for a kids party!! Thanks for the great idea!
ReplyDeleteAndy
Poppies at Play