The Story of a Mom, a Wife a Small-Business-Owner-Hopeful (Happy Baby Designs) and a Craft Lover, trying to be present (not just exist) in my life with my children, my husband and myself. Follow along with me as I chronicle my crafting and business endeavors, my true life and some mommy moments along the way .


Thursday, September 30, 2010

Play Kitchen Reveal...finally!

As you may recall, I gave you a little sneak peek of a project I have been working on this summer. For those of you that guessed it was a Play Kitchen, you were right! I have been obsessed with these play kitchens that I've been seeing all over blogland and knew I just had to make one for my kids.

So without further ado, here is the big reveal...

(I plan to paint the burners on the "stove", but I couldn't wait to show it to you so it's not exactly finished...yet!)

My daughter is testing out the oven...

We used a long metal drawer pull for the oven door handle.


The faucet started out as a brass mess, but with a little elbow grease and spray paint it was transformed.


I think the sink basin was a dog bowl in its past life.


We added a towel bar on the side for their tea towels.


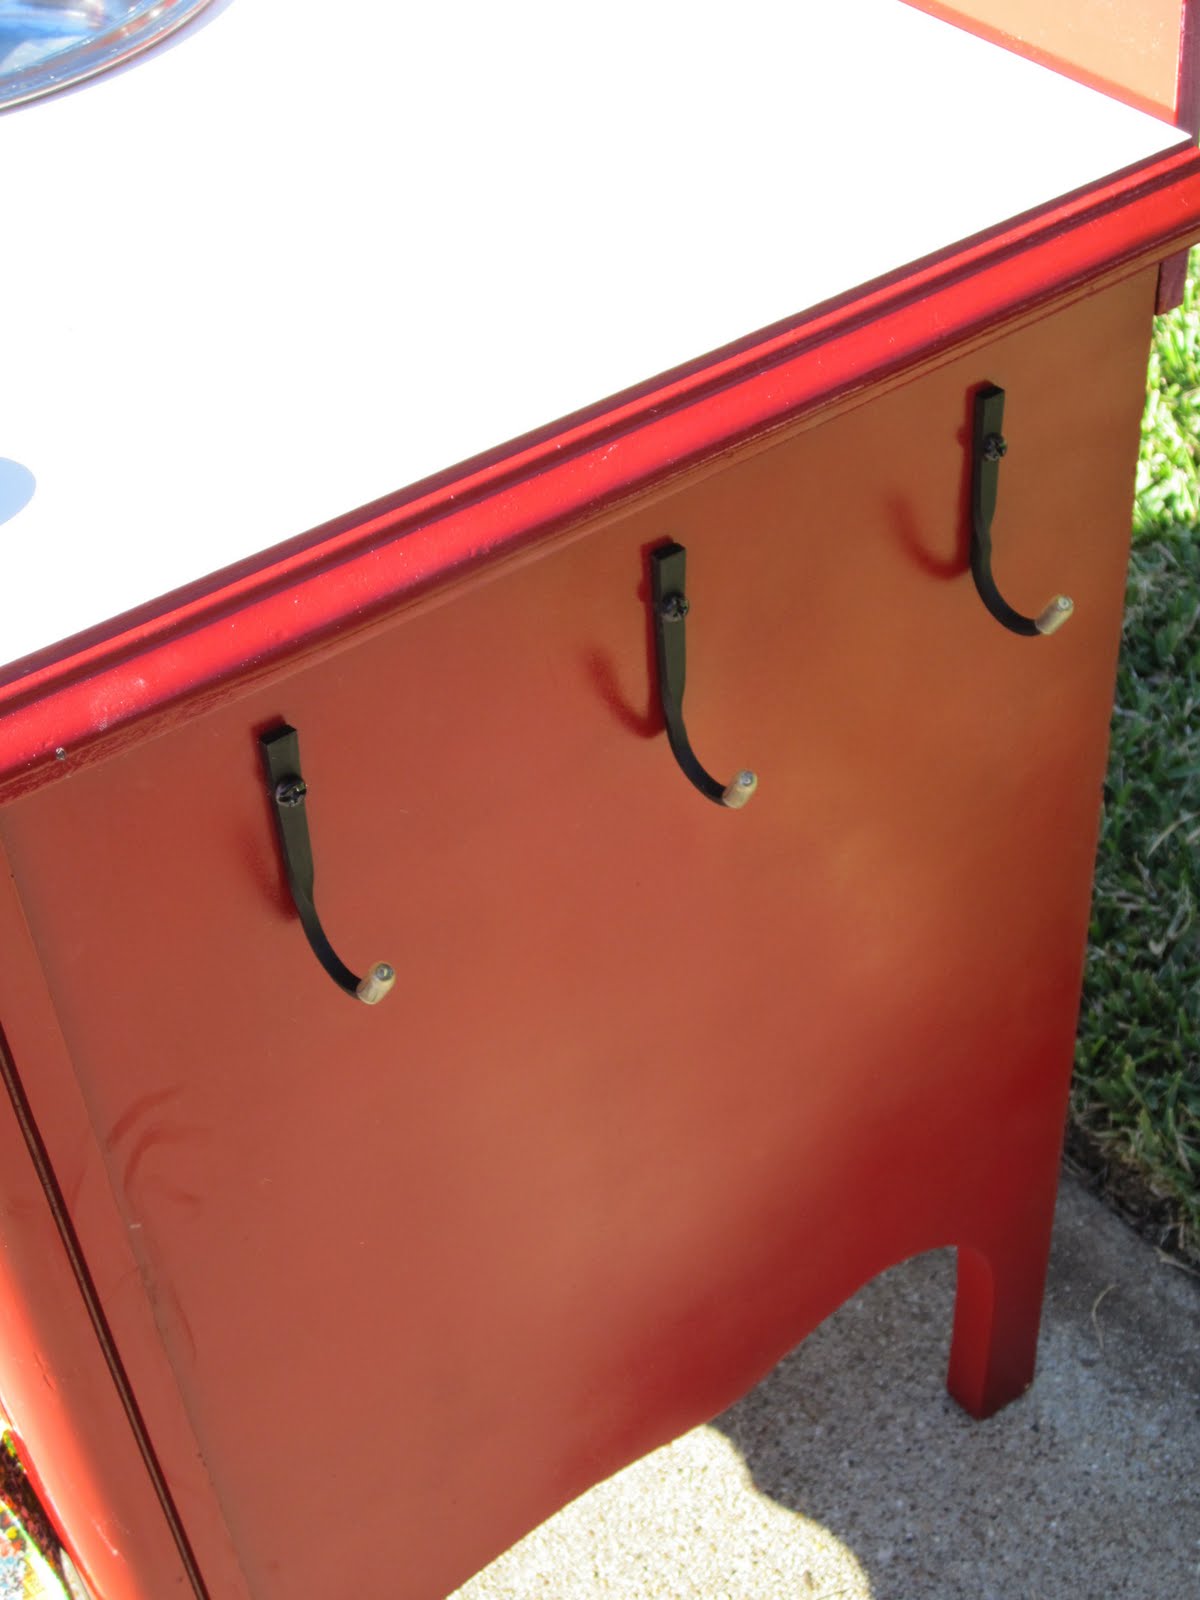
And we put some hooks on the other side for pot holders, utensils, etc.


I made the curtain using a tension rod and some fabric that I bought at an estate sale years ago that I've been holding on to. Not only is it super cute, but my mom actually made my sister and I baby blankets out of this same fabric when we were kids!


So there's the kitchen. I LOVE, LOVE, LOVE how it turned out! I think it is way cuter than any plastic kitchen I could buy at the store. And it's even more special because my husband, dad and brother all helped me to make this kitchen for the kids.


But it didn't always start out so cute. Now I'll show you some of the Before pictures...


I found this nightstand on Craigslist for $10! It was the perfect size and I loved the legs and curvy detail. I have seen so many cute play kitchens out there, but mine was heavily inspired by this one by Kate over at oh write!. When I saw her kitchen I thought it looked like an old stove. It was those same details in my nightstand that sealed the deal for me. I knew it would be the perfect base for the kitchen. Oddly enough, the top was even laminate!

We simply took out the drawers and their "parts". We unscrewed the top and began the laborious task of priming, painting, taping off, painting some more, and so on, and so on...red takes a lot of coats to cover!

(I totally forgot to put a piece of cardboard under the cabinet so my driveway is now accented with red spray paint...oops!).

I found this horribly ugly and dirty faucet at our Habitat for Humanity ReStore for $4! I think the guy thought I was crazy for even paying that much, but I knew it had potential.

I cleaned it, took all of the parts apart and then primed it and spray painted it silver using Valspar Metallic spray paint. I did also coat the faucet with a clear top coat since I know it will get a lot of handling.

I don't have pictures of ever step (bad blogger!) but I also used the silver spray paint to paint the inside of the oven.

I found the towel bar and oven door handle at the ReStore as well, each for $2! The hooks I had on hand and the dog bowl was found at Goodwill for $.75.

I used cheap lumber from Home Depot to make the oven door and backsplash. I just had them cut the pieces to size and then attached the backsplash with screws and the oven door with hinges (that I already had). We bought a magnetic closure to attach to the oven door to keep it closed (I think that cost around $3).

So for the cost of some hardware, spray paint and wood, we were able to transform a $10 nightstand into a play kitchen that I know my kids will love for years to come!

Any of you tried your hand at making your own kitchen (real or play)?


Linking up to these fun parties...

toolsareforwomentoo
Making
The Girl Creative

mmm button
The DIY Show Off

Join  us Saturdays at tatertotsandjello.com for the weekend wrap  up           party!


Furniture Feature Fridays

Thursday, September 23, 2010

Holiday Spirit? Not so much...

All over blogland, crafty ladies are redecorating their homes in beautiful fall creations. They're elaborately constructing Halloween costumes and gifts. And have you walked through a craft store lately? They've had their Christmas decorations up since 4th of July!

Is it wrong that all of this holiday stuff makes me crazy? It's still 90+ degrees here in Texas and I just find it impossible to get in the holiday spirit. Maybe it's because I have a million other things to do before the holidays arrive and I can't handle the constant reminder that it's nearly October already! I also feel the pressure as a "blogger" to post some creative holiday projects. I'll be lucky if I have Christmas tree up before December 25th!

Am I alone in my feelings? Maybe once it starts cooling down I'll be more in the holiday spirit, but for now it just makes me crazy!

All photos courtesy of Better Homes and Gardens.


I'm participating in this week's Social Parade. If you're visiting for the first time, Welcome! Take a look around (I'm not usually so bah-humbug) and maybe you'll come back again and visit sometime!
Smart and Trendy Moms

Wednesday, September 22, 2010

Yoga Mat Bag and Strap...All in One!

When my sister's birthday came around this summer, I knew exactly what I was going to make her! Like me, she practices yoga regularly. But unlike me, she has to take her yoga mat back and forth to every class. So I decided to make her a yoga mat bag.

I had seen a sling-like yoga bag at a yoga training I had been to awhile ago. What was really cool about it was that it doubled as a yoga strap! I scoured the internet in search of a similar bag since I only had a vague recollection of the one I had seen. Needless to say I couldn't find anything like it so I decided to come up with my own "design".

And here's what I came up with...


I had found this amazing silk fabric at an estate sale years ago and had never found the perfect project for it...until now!

Here's what I did...

- Cut a piece of fabric that is about 22.5" by 90". The tricky thing for this project, though, is that you'll need a fabric that is 1) not stretchy (since you'll be using it as a strap) 2) washable (since you'll be putting a sweaty mat in it) 3) pretty on the inside and out 4) not too thick (since you'll be using it as a strap) and 5) kind of silky (so the yoga mat will easily slide in and out). The silk worked perfectly, but can be costly since you need so much of it. But I have yet to find a fabric other than silk that would satisfy the above requirements. Maybe you'll get lucky and find some at an estate sale ;)

- Wash your fabric. I line dried mine since I wasn't sure how the silk would dry in a dryer. Then iron it. The beauty with silk is that it still looks good even with some wrinkles in it :)

- Fold the fabric in half lengthwise and sew a stitch all the way down. I simply used pinking sheers to prevent fraying, but you could also zig zag stitch or serge it (if you're lucky enough to own a serger!).

- Double fold each of the short ends down, pin and sew it. Disclaimer: If you're paying close attention to the picture below you'll notice I turned the fabric, then pinned it and took my picture. Don't do it this way! Don't turn your fabric yet. I just forgot to take a picture of the correct way!

- I stitched around each end twice, making sure the second stitch was as close to the edge as I could get it. Since my sister will be taking her yoga mat in and out frequently, I didn't want it to catch on the fabric.


- Now turn your fabric. You should now have one long tube of fabric with the pinked edge inside and the ends stitched closed.

- Fold your "tube" in half and mark the center point. Now stitch all the way across the width of your "tube" where you've marked the middle. I double stitched for added security. (This may seem confusing but you should now have one long tube that is stitched in the middle so that when you drop your yoga mat in one end it only drops down halfway, not out the other end.)


And that's it! You're done!


Drop your yoga mat in either end of your bag and tie the ends together on your shoulder...

...or use it as a strap during class! (Note to self: this is not an attractive angle.)


My sister has been using hers for a couple of months now (I'm a little behind on my tutorial!) and says it is working great! She's even had several people want to buy one...I may just have to add these to my Etsy shop :)

Let me know if you make one for yourself or the yoga-lover in your life! And as always, please only use my tutorial for fun, not resale.


Partying here:


Get your craft on Thurs.
HookingupwithHoH
giveaways


Thursday, September 16, 2010

Car Playmat...New Fabric

In case you weren't reading my blog waaaaaayyyy back in April (that's a long time in the internet world), I showed you my tutorial for making these fun car playmats.


At the time, I had so many people interested in them that I thought I'd make some more and put them in my Etsy shop. Well, much to my disappointment, they no longer make this fabric! :(

Fast forward to present day as I prepare for the holiday craft fair I am planning to sell at (Yikes!). I wanted to make more of these playmats so I scoured the internet in search of a fabric I could use.

And here's what I found...

I ordered this one, appropriately entitled "Planes, Trains & Automobiles" by Timeless Treasures from the Fabric Depot. It's on sale for $7 a yard! I haven't received this one yet but I'm really excited about it. I think it's the closest to the original fabric that I used.

I also found this cute fabric at Hayloft Fabrics on sale for just $7.59 a yard. It's also by Timeless Treasures and it's called "Cars/Trucks on Green".

I was a little worried that this fabric wouldn't be "fun" enough since it's just roads (no buildings, etc...) but I am happy to report that my son gave it a test drive last night and is now requesting a car playmat out of this fabric!

And finally, I found this "Airport" fabric also by Timeless Treasures, also at Hayloft Fabric, also for $7.59 a yard.

My son has a lot of planes but they don't really make anything for kids to play with their planes on. I thought an airplane playmat would be perfect! And this fabric is super cute so of course I had to have it. :)

So that's what I've been up to. As you can see, my computer is thankfully back in business thanks to my husband, $99 and the Norton anti-virus guy! My camera, unfortunately, is not back in business. I am hoping to rectify that situation very soon. Do you know how many impossibly cute pictures of my children I have missed out on since our camera died? It's killing me!