The Story of a Mom, a Wife a Small-Business-Owner-Hopeful (Happy Baby Designs) and a Craft Lover, trying to be present (not just exist) in my life with my children, my husband and myself. Follow along with me as I chronicle my crafting and business endeavors, my true life and some mommy moments along the way .


Thursday, December 16, 2010

Craft Night - A New Tradition

I love to craft (duh!) but have you ever noticed that it's so much more fun and you get way more done if you craft with other people? And I don't know about you, but I start a lot of projects that don't get finished. So I wanted to start a craft night and get together with girlfriends, some food and wine and do a project, start to finish. I was inspired by Cassie over at Primitive and Proper who gets together with her girlfriends once a month for Wine and Design. So I decided to host my own craft night.

I invited the ladies from my PTA group over to my house for a night of making hair bows. If you have a little girl then you know how expensive hair accessories can be. They're so easy to make and you can customize them for every outfit if you make them yourselves. So everyone showed up with some snacks, ribbon and a glue gun and we got to work.


We made some "starburst" clips...

Some double layer bows...

And a few of the ladies that stayed late learned how to make these adorable heart clips...

It was so much fun and everyone left with a few new hair clips for their little ones...and the skills and knowledge to make more! We had such a great time that I'm already planning next month's craft night ☺

Do you get together with your girlfriends to craft, sew, scrapbook? Any ideas for a January theme?

Tuesday, December 7, 2010

New Holiday Traditions

This year has been the first year where my husband and I have consciously started some new holiday traditions with our kids. Our kids are now 3 1/2 and 1 (almost 2) and it seems like the first year where they're both really getting in to the holidays.

So our first new tradition of the year is that we went shopping and let them each buy a new Christmas ornament to hang on the tree. They were so excited to get to pick just the right one and come home to find the perfect spot on the tree for it.

My son picked a race car ornament (of course).


And my daughter picked Winnie the Pooh.


My hope for this new tradition is that by the time they are moving out of the house (sniff, sniff) they will have a collection of ornaments to take with them to decorate their own first Christmas tree (someone please slow down time...please!). Each ornament will carry a special memory with it and whether they're near or far, they will always have a little bit of home with them during the holidays (ok, now I'm really crying!).

So how about you all? Did you start any new traditions this year? Or did you start new ones with your kids that you have loved and would share with us newbies?

Sunday, December 5, 2010

Children's Gift Ideas

As Christmas is QUICKLY approaching, I thought I'd revisit some of my favorite children's projects from this year. I'd like to make something for my kids this year, but I haven't decided what yet. It seems like I have a million things going on and it's been hard to evening think about new projects! But hopefully these will give you some inspiration!


Turn your kid's art into a T-shirt. They will be so proud to wear their art!

I love these floor cushions inspired by Land of Nod. Pair it with some new books and you have a great gift for any age!

How about a little apron for that budding chef of yours...or any child that likes to make a mess ;)

And how about a new kitchen to go along with that new apron?

These no-sew tutu's would be so cute in red for the holidays.

If you have a little boy in your life, and he likes cars, he must have a car playmat!

And what little girl wouldn't love a matching bib and diaper for her dolls? I would've totally loved these when I was little!

This dinosaur crown would make a great stocking stuffer!

And whether you make these I-Spy Books and Bags for presents or for travel during this holiday season, your kids will LOVE them! My kids still love to search for "new" things in their books and bags.


Hopefully this has given you some gift ideas for your little ones this holiday season. Now I just need someone to give me some ideas as to what to make my little ones! Any suggestions?


Linking up here:

Making

Photobucket

mmm button
The Girl Creative
The DIY Show Off
toolsareforwomentoo
Polly Want a Crafter

Photobucket

Friday, December 3, 2010

Binky Bag Winners!

I am excited to announce the 2 winners of the Binky Bags are Cassie and Olga! Yay! These are the bags these lucky ladies have chosen.

Cassie

Olga

For those of you that didn't win the giveaway but still would love to have a Binky Bag (for yourself or a friend), I'm offering a special to my lovely blogger followers. I am offering FREE SHIPPING (that'll save you $5) through the weekend. Just email me with the subject "Binky Bag Offer" and let me know what bag you want. Remember I'm selling at a craft fair this Sunday so if you want to make sure to get the bag you want, place your order now! The cost for the Binky Bag is $15 and I accept PayPal. Consider pairing it with a Blankie or matching Burp Cloth for just $10 more!

And as for Cassie and Olga, send me your address to happybabydesigns@yahoo.com and I'll get your Binky Bags in the mail to you ASAP! (And make sure I got your bag choice right).

Thank you everyone who participated in my Giveaway! Have a great weekend!

Thursday, December 2, 2010

Christmas Yarn Wreath

I decided to jump on the bandwagon and make a Yarn Wreath for our front door this year. And I'm so happy I did. Ours will be the cutest door on the whole street!


I started with a green foam wreath and a skein of green yarn. I used a slightly thicker yarn and one with a little texture to it, but you could use any kind of yarn you'd like. I tied a knot in the end of my yarn, pinned it in place on the wreath and started wrapping.

Wrap the yarn tightly and make sure it's snug up against itself. (It really helped to have the foam and yarn be almost the same color because I could get away with tiny gaps and it's not noticeable.)


I sat and did this in front to the TV and it really didn't take me that long to do. And it didn't even use up half of a skein, so it was a very economical project. You might even have enough yarn laying around your house that you could use.

Next I gathered up some scraps of Christmas fabric and felt that I had on hand and cut up a bunch of triangles. Then I pinned them to 3/8" ribbon and sewed them together.


I simply pinned the ribbons to the back of the wreath.


And voila! I LOVE how it turned out. This wreath was so easy and it'd really be fun to customize it for every season/holiday/occasion.


And as a bonus, since the ribbons are just pinned in to the wreath, they're totally removable. As I was trying to figure out how to embellish my wreath, I first came up with this idea.


I walked around my yard (and my neighbor's yard...shhhh!...) and collected some pretty leaves. Then I just straight-pinned them in the wreath where I wanted them, making sure to hide the pins with the leaves as I layered them.

But then I decided it was too much Fall and not enough Christmas, so I abandoned the leaves. But since everything is simply pinned in place, it's all changeable! So you could have one wreath and just change out the embellishments throughout the year!

The possibilities are really endless with these wreaths because there are so many cute ways to embellish them. Let me know if you make your own!


Partying with these awesome ladies:

Med


Catch As Catch Can


Photobucket

Wednesday, December 1, 2010

DIY "Antique" Sign

If anyone asks, I bought this sign at a quaint, little, small town antique store ;) But you and I know the truth...I made it!


I was inspired by Miss Mustard Seed's Fresh Berries sign...

...but I don't have a projector so I had to come up with my own way to make my sign.

I started with this plaque (?) from Goodwill. I liked it because it was 3 dimensional and had nice beveled edges. But you could really use any scrap piece of wood, door, etc...

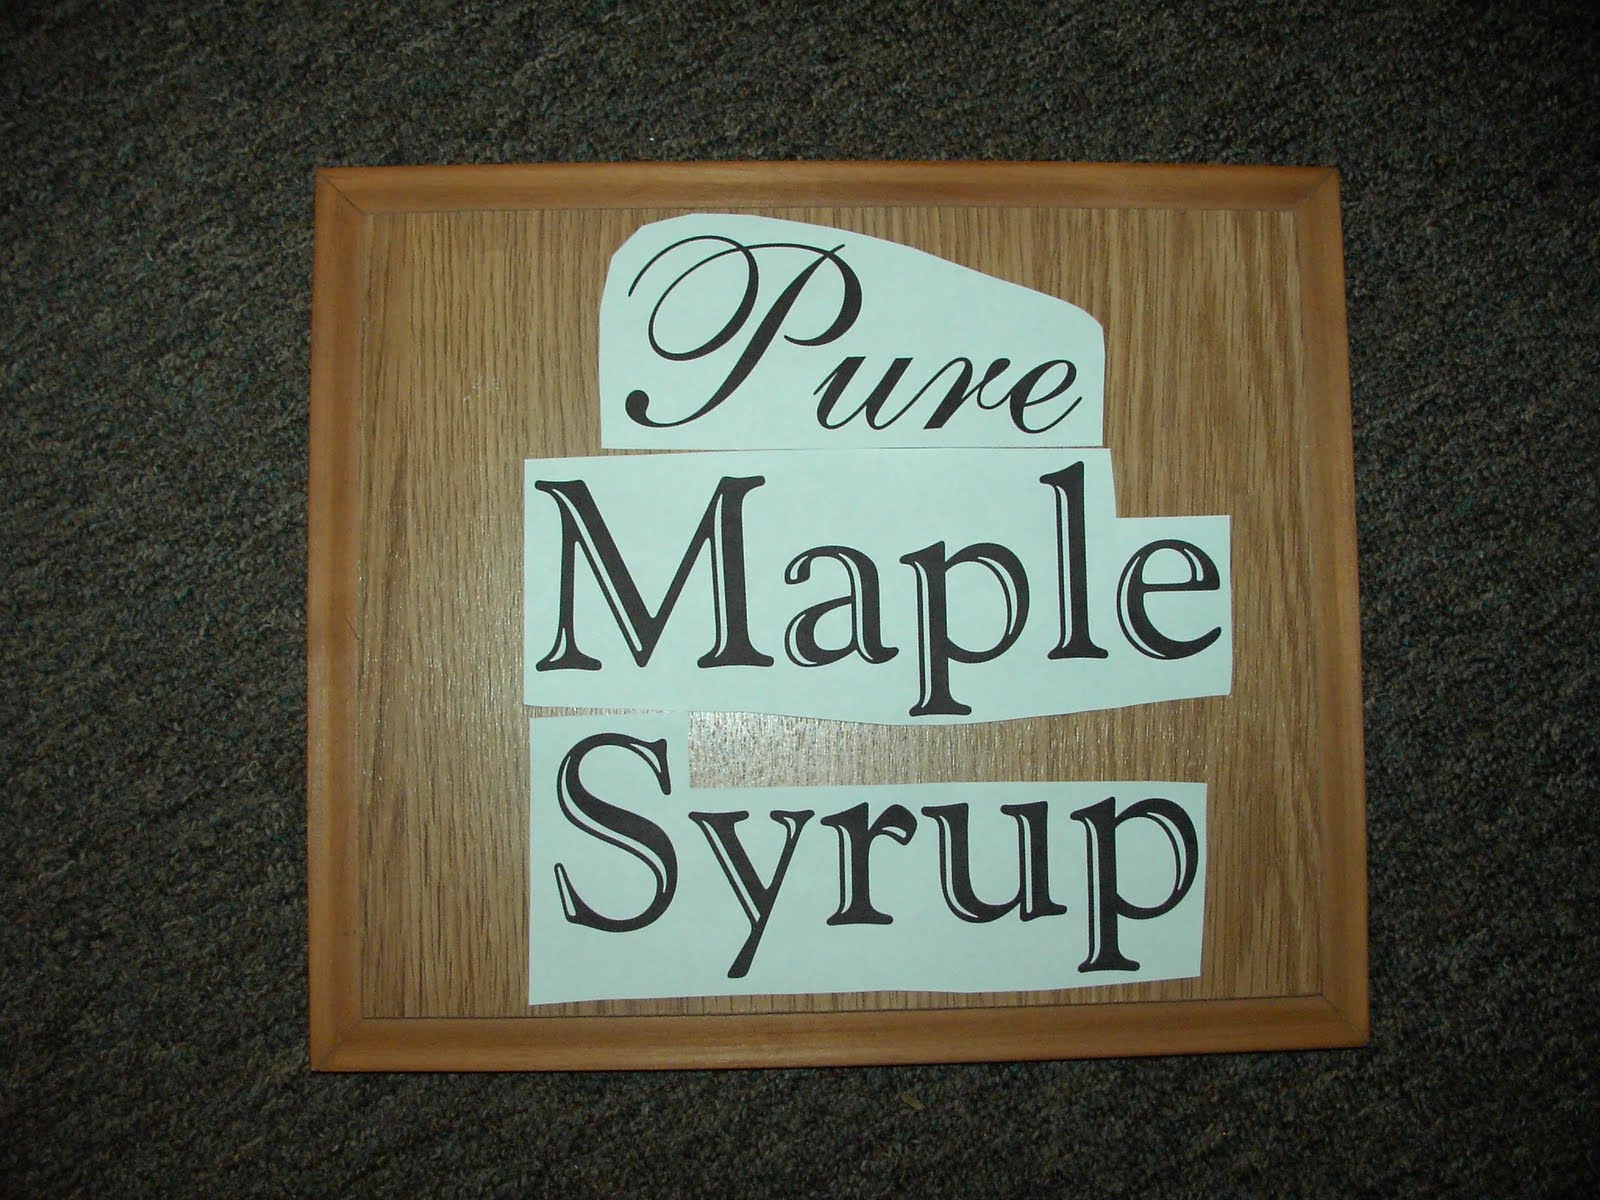
Next I printed my words on the computer and did a dry run fitting to make sure I liked the scale and placement.


Since the wood on my plaque is actually a veneer, I primed and then painted my sign with an Oops paint in a gray/blue color. (I forgot to take a picture of this step, but you get the idea.)

Next comes the very complicated technique that will allow you to transfer any font on to your sign. Tracing. Yes, that's right, the secret to this sign is something we all learned how to do in elementary school. Trace the backside of your letters using a pencil.

Very complicated, I know! (I also taped my sign together after I did my dry run so it would stay the way I wanted it, but you don't necessarily have to do this.)

Now flip your sign right side up, tape it on your wood/plaque/door, whatever, and start "rubbing" over all of the letters using a pencil.

This is not an exact science, you just want to make sure you rub over every letter.


Now when you remove your paper, your wood should look something like this...

Now it's time to paint your letters. You could use a paintbrush, but I actually used a paint pen because I had better control that way.

Pretty cool, huh? This is a very easy project, but I will say that my wrist was a little sore after the tracing. But totally worth it!

Now obviously, I didn't want to leave my sign like this. It might work for some projects, but I wanted an "antique" sign.

So I sanded, painted, distressed and antiqued the sign until I was happy with the outcome. I didn't want to sand down to the wood since it was just veneer, but if you have a nice piece of would, that would be a great way to distress it. I had to rely on paint and stain for most of my distressing. I diluted some white, green and brown acrylic paint with water and just started painting over my sign until I had the look I wanted.


And finally, I rubbed on some walnut wood stain with a dry cloth and then rubbed it off to seal it and give it that nice "aged" look.

I love how it turned out and it was super easy and cheap! You could use this technique to make any sign on any piece of wood. The possibilities are endless! What will your sign say???


Linking up here:


Make it Yours @ My Backyard Eden
Blog Button
Show and Tell Green
Hump Day link
 http://www.thethriftyhome.com


HookingupwithHoH
toolsareforwomentoo


Catch As Catch Can