

We went shopping for fabric and he picked out some Lightning McQueen fabric from the movie Cars (he is in love with all things Lightning McQueen).
I'm sure there are a ton of tutorials out there for child aprons, but here's how I made mine (I was going for super easy!). You only need about a half a yard of fabric and 2 packages of double fold bias tape (I used 1").
I folded my fabric in half and then cut out my basic shape. The length of my apron (which fits my 3 year old) from top to bottom is 20". The bottom is about 17" across and the top is about 5 1/2" across. The armholes are about 9" long. The beauty of an apron, though, is that size doesn't have to be perfect, so don't get too hung up on the measurements.
Notice I did not make the armholes rounded. This makes it easier for sewing the bias along on the edges (remember, I'm going for super easy, here!). (Sorry about my un-ironed fabric, but my iron and I were in a fight that day. We've since reconciled.)

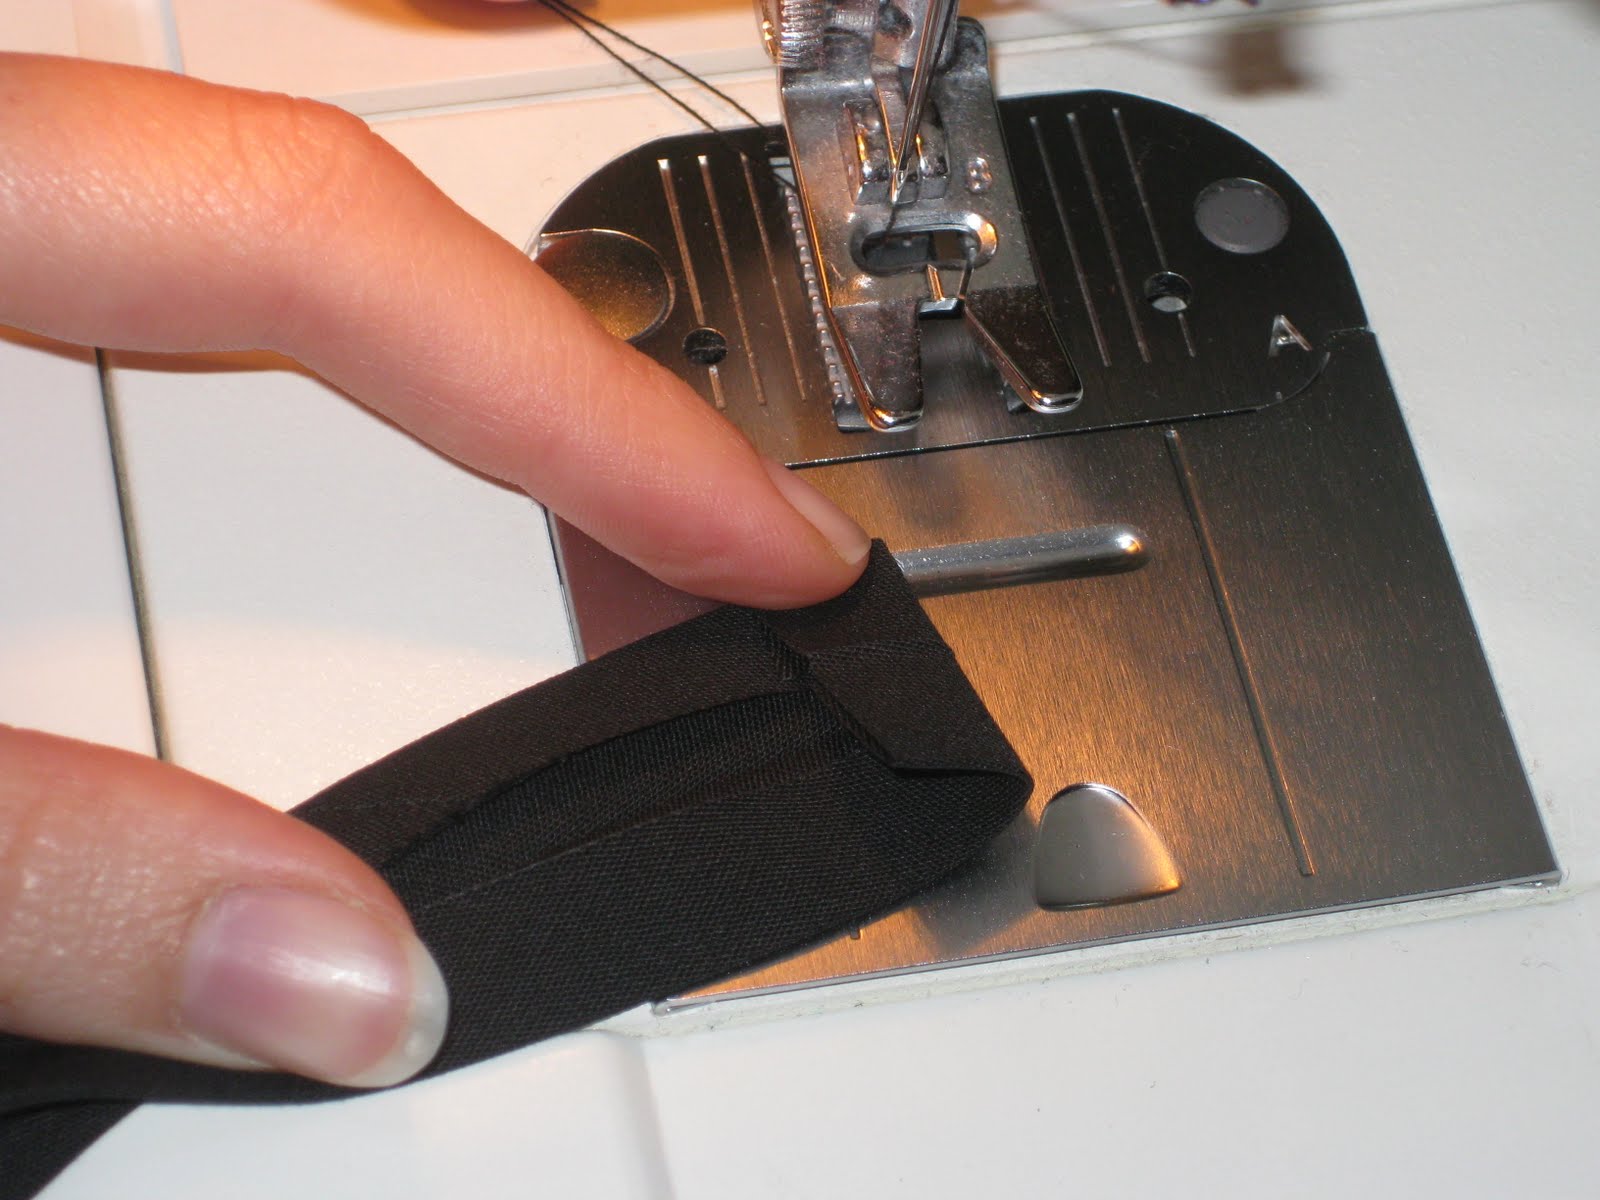
Next (after you've pressed your bias tape), begin pinning it to your apron. Start by pinning a small piece across the very top.

Then, leave about 14" of slack that will make up one of the ties around the neck and begin pinning along the side of your apron.

Turn the corner at the armhole (easy to do since I didn't round the armhole).

Depending on how comfortable you are with bias tape, you can actually wrap all the way around your apron finishing with 14" of slack to make the other tie for the neck. I however, cut the bias tape when I got to the bottom since it was easier for me to pin and sew it without having to round the corner.

Here's what it will look like once you have it all pinned.

Now cut a piece of your bias tape that is about 42" long. Pin it across the chest of the apron (I just sort of eyeballed where it would look good) leaving 14" of slack on either side. These will be the ties around the waist. I really like the detail it adds to the apron!
 You could also add a pocket if you are so inclined, but since I was trying to make the world's simplest apron I opted to leave the pocket off. Besides, I didn't really want my child to have a pocket to put flour, paint, cookie dough, etc. in!
Now that you have the whole thing pinned, it will look like this...

Now you're ready to begin sewing. Start with the left neck tie. You'll want to open up your bias tape, fold it down about 1/2 an inch...
and then close it back up before you begin sewing (make sure to do this with all of the ties).
 Sew all around the apron, then across the top, then across the waist ties and chest. And that's it! I told you it was super easy!
He's very proud of his apron and has already informed Daddy that he will now be helping him grill. Too cute!

And here's how it looks from the back...

And there you have it. Super cute, super functional, and SUPER easy! Let me know if you try one for your budding chef, messy little one, or future artist.
As always, please only use this pattern to make aprons for your own personal use, not for resale. Thanks!
Linked to:


Spotlight Yourself Wednesday


Works For Me Wednesday


It's So Very Creative Monday


Oh that is just darling. Someone should make boy aprons, I have never seen any anywhere. With all of the popular male chefs on TV it is no longer thought of as for ladies only! I hate sewing on bias tape, I never quite get it right!
ReplyDeleteThat is super easy, I could possibly manage that! I love the fabric!!
ReplyDeleteThat apron is great! Your little guy looks so proud!
ReplyDeleteGreat tutorial too! Thanks!
~Liz
What an adorable apron! Great tutorial too! Would love to have you stop by the Sunday Showcase Party if you get a chance! My little guy would love this! I think I need to make one! Hope you had a wonderful weekend! Stephanie Lynn
ReplyDeleteI'm a new Monday Follower! Visit me at http://www.rockindeals4you.com/?p=3361 and sign up for my newest giveaway!
ReplyDeleteSoooo cute! I made aprons for my girls when they were little and helped me in the kitchen!
ReplyDeletecute project, cute lil' guy! Thanks for linking up to "AP tuesdays!"
ReplyDeleteVery cute!
ReplyDeleteyou make bias tape look easy! thanks for linking to Take-A-Look Tuesday! Mandy, www.craftedition.blogspot.com
ReplyDeleteOH my goodness. My boys would go crazy over this! Good to "meet" you over all the linky parties. hehehe.
ReplyDeleteOh,this apron is just the cutest and you son is the most adorable model! Woo Hoo! You did a great job making this little man sized apron. It's the first I've seen of this size. Thanks for linking to Woo Hoo! Wednesday.
ReplyDeleteThat's really cute, and a great tute. I've come to realize recently that there just aren't enough things out in craft-land for boys, so this is extra nice to see.
ReplyDeleteAwwwwwwww, thats soooooo cute! My little guy would FLIP for one of those!!!! I wish I was talented in the sewing department! lol
ReplyDeleteThanks so much for linking up to gettin' crafty on hump day :)
Such a cute craft apron! Love it!
ReplyDeletePerfect! My daughter has been begging me to make her an apron to help me cook. She'd be thrilled with this!
ReplyDeleteWhat a great tutorial. So cute and an even cuter model. Now you will definitely have plenty of help in the kitchen!
ReplyDeleteGREAT apron...gotta love Lightening McQueen!! Great job encouraging your son in the kitchen. We always did too and now our sons (aged 26 & 17) are super cooks :)
ReplyDeleteBlessings!
Gail
I don't know if I'll get to try this any time soon (busy with a new baby), but I think how you laid out the directions is excelent. I wish everyone trying to explain how to make something would do such a good job:)
ReplyDeleteWhat a great apron! Super easy and super cute.
ReplyDeleteThanks for the tut and for linking up with What are little boys made of?
Very cute and you've made it super easy for anybody to follow. Thanks!
ReplyDeleteSo cute! I love that he loves to play with flour. You may have a future chef on your hands!
ReplyDeleteThanks for sharing at My Backyard Eden!
Cute, cute, cute!!! Y'know, I'm a granny myself, and I could really go for an apron made from Lightning McQueen print of Mater!!
ReplyDeleteMy Show n Tell is my finished, newest, watercolor painting...I do hope you can stop by to view it and give me some critique!! Click HERE
Have a great Friday.
I don't know what's more cute...that apron or your little guy!! SOOO CUTE!!
ReplyDeleteThanks for sharing and linking up to I'm Lovin' It! Have a GREAT weekend!
Very Cute! I came over from Remodelaholic! My little man loves to play with a plastic shoe box full of craft sand, funnels, spoons, etc. Never thought of an apron!
ReplyDeleteGreat idea! I'll be sure to keep this in mind!
ReplyDeleteCute apron and adorable boy! Your instructions are clear and well presented, thank you for that. Love the cars fabric, too.
ReplyDeleteYour son and my son would get along fantastically! He's a "Cars" fan too. Love the apron!
ReplyDeletethe apron turned out so cute, and your son is such a good sport to model it for us. It definitely looks easy to make.
ReplyDeleteI have awarded you the Versatile Blogger Award! Head on over to SSB and check it out!
ReplyDeletehttp://superstinkyboys.blogspot.com/2010/05/versitile-blogger-awardi-won.html
Ginger
SSB
This is too cute btw! Link it up to Mad Skills Monday over at SSB! My son LOVES Cars...I may have to make something like this for him.
ReplyDeleteGinger
SSB
Thanks for linking up to Mad Skills Monday!
ReplyDeleteGinger
SSB
That looks great! I know some little guys that would love the cars apron!! Thanks for linking up!!
ReplyDelete