
I had this wooden box that some of my children's play food had come in. Since we never put the play food back in the box, I decided it would be the perfect "canvas" for my subway art project.


The first thing I did was decide what I wanted my subway art to say. A lot of people use family rules but since mine was going in our bedroom, I wanted it to be something about love, family, marriage, etc... I found a quote that my husband and I both liked and got to work.
I had some leftover self-adhesive letters from a previous project and I decided they would be much easier to use these rather than printing, cutting, adhering, etc...
After I primed the "canvas", I measured my letters and my canvas, plotted my design...
 and began adhering my letters. This part is kind of a pain, but you want to make sure to get your measurements right so everything fits and is fairly even. (My 3 year old wanted to help so I let him be in charge of the camera. Not too bad!)
 Here's what it looked like after putting all the letters on.
 Next, it was time to paint the canvas. Most of the subway art I have seen has been black with white letters. Unfortunately the black and white didn't really fit with the color scheme in our bedroom so I decided to use a reddish color instead. I didn't like any of the colors that I already had and I see people mix their own paint all the time, so I figured I'd give it a try.
 A little red, a little brown, a little yellow and voila!
 Then I peeled off the letters.
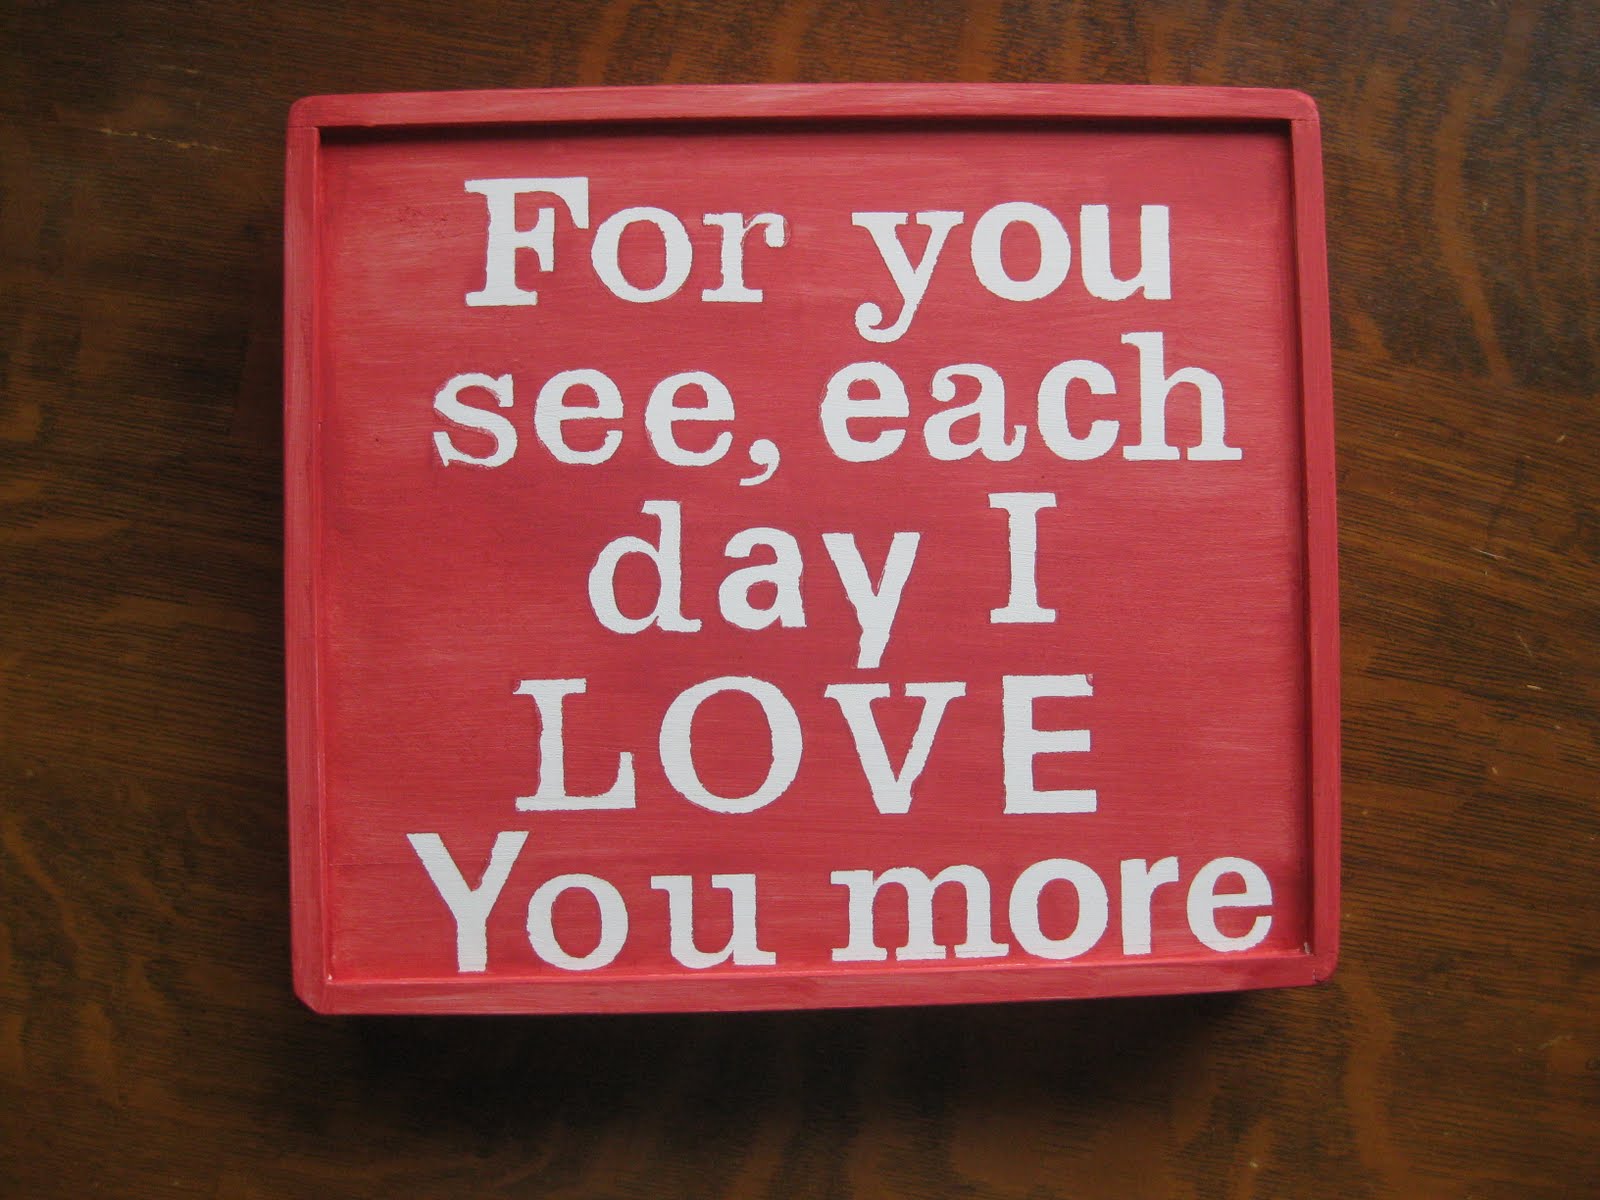 You can see in the close up below that the red paint bled a little under the letters. I just took a white paint pen and cleaned up all the edges.
 I didn't like the stark white letters, so I mixed a little bit of light brown paint with some water until it looked kind of like coffee with a lot of cream (only runnier).
 I went over the entire canvas with this paint/water mixture. I tried not to make it a consistent finish in any one area so it would just look aged, not dirty.
 Then I sanded the whole thing. Again, I sanded some areas more than others until I got the look I was going for.
 Finally, I applied a wood stain to the entire canvas using a rag. I wiped off most of it as I went since I just wanted it to add a touch of dimension, shine and protection, not change the color dramatically. And here's what I ended up with.
Not bad for a project that cost me NOTHING! This will hang proudly in my soon-to-be-newly-remodeled master bedroom.
Linked to:


Making Monday Marvelous by C.R.A.F.T.


Show and Tell Friday at My Romantic Home


Spotlight Yourself Wednesday with Santa's Gift Shoppe


Wow, I love this! Great job!
ReplyDeleteThats adorable! Great job!!! Thanks for linking up to gettin' crafty on hump day :)
ReplyDeleteWoo Hoo! You did good, girl!! I love this project. Can't wait to see all the other stuff you do for your "new" master bedroom. Thanks so much for linking this project to Woo Hoo! Wednesday.
ReplyDeleteClever, Clever, Clever. I love having this in your master bedroom too! Thank you for sharing!
ReplyDeleteVery Nice. Thanks for linking up today!
ReplyDeleteVery, very nice for free!!
ReplyDeleteLOVE IT! Much easier than stamping! AWESOME!
ReplyDeletethis is awesome I like the header in your blog
ReplyDeletealso . wow it's so cool to find another texas
stay at home mom
HI! Found your site through FMBT, even though it's Wednesday :-) Great site and ideas. Come follow me at http://tvstake.blogspot.com Thanks!
ReplyDeleteoh i love it and i love the saying you chose! and i love that you did your own take on it and went red with it. very cool!
ReplyDeleteVery clever, using the stickers! Thanks for sharing!
ReplyDeleteWow, it just kept getting better! I loved the end outcome! What does your 3 year old charge an hour?
ReplyDeleteSo cute! And your helper did a great job!
ReplyDeleteVery cool! i love it! :)
ReplyDeleteLove it!! Colors are perfect!
ReplyDeleteI'm your newest follower from FMBT. Also "Liked" your blog page on Facebook. Please drop by my blog and return the favors.
ReplyDeletehttp://alittleoftheother.com
Have a great week,
Ellie
Fabulous idea! Love it and the distressing is wonderful!
ReplyDeleteCute! and what a great idea...looks good!
ReplyDeleteI'm dying for a sign like this and YOURS is FABULOUS! GREAT job! So glad I saw this on remodelaholics!
ReplyDeleteI love this! That quote it wonderful!
ReplyDeleteI've been making my own stencils for a while but have been wanting to use vinyl letters to paint over for a while but wasn't sure how it would turn out. Your sign looks really great - I love the saying too!
ReplyDelete~Sam
I just love the saying but how you put it together is genius! How can you not smile each time you see it? I'm your newest stalker (follower). Have a great weekend!
ReplyDeleteThis turned out perfect. I love the color you made!
ReplyDeleteThanks for sharing at Saturday is Crafty day!
Laura @ along for the ride
So adorable! I love the overall woodsy effect of the piece. Is it a picture or a sign it makes you ask. Both! Your designwork is very cool. :)
ReplyDeleteThanks for linking up to SNS!
FJ Donna
http://funkyjunkinteriors.blogspot.com/
Looks great! The sanding and the glaze really added a lot of character and depth :-) Love how you reused packaging too.
ReplyDeleteThis is so fabulous and your quote is just lovely. Thanks for sharing this idea- I love it!
ReplyDeleteBest wishes and happy weekend,
Natasha.
Great Job!!! I saw your link on Sunday Showcase and I am your newest follower! Nice to meet you. Have a great Memorial Day weekend!
ReplyDeleteBonnie
I love this! I particularly love the quote! Makes me want to hug my hubby! :)
ReplyDeleteI'm your newest follower! :) If you get a chance, check out craftsandsutch.blogspot.com :)
Happy weekend!
Erin :)
It's really cute. I love that you mixed your own colors and added your own stain. And the sanding! It just really sets it off. Looks like something out of a chic boutique!
ReplyDeleteWhat a great idea! I love the color! I just clicked over from Tatertots and Jello. I would love to link to this if you didn't mind.
ReplyDeleteThis is really cute, great job and I love the saying!
ReplyDeleteOh, that is so cute. I love it.
ReplyDeleteNow aren't you the most creative one! I love this and what a great job you did too!
ReplyDeleteBe a sweetie,
Shelia ;)
Great inspiration -- and a great sentiment, too!
ReplyDeleteVery cute, this looks great! I would love to see it after its hung in the bedroom too! I especially like the aged finish you used. And your son is a fantastic photographer for 3yrs old. Happy Memorial Day!
ReplyDeleteIt looks great! I had never heard of subway art but I love the sign, and love the fact that it was free even more. Way to repurpose!
ReplyDeleteLove that! And I like how you used alphabet stickers -- that's definitely something I want to try. Great job!
ReplyDeleteI did not know the connection to Subway Art, but I'm from a small town. We do have caves!
ReplyDeleteA nice job from simple ingredients.
Thanks for sharing.
This is AWESOME! I'm inspired to make my own now!
ReplyDeleteCorinna
www.myscrapbooklife.com
Thank you so much for linking this project to the Boardwalk Bragfest. I wanted to let you know that I really loved it and have featured it.
ReplyDeleteFeel free to come by and grab a "featured" button, and I hope to see you again this Wednesday.
You can find your feature here:
http://wwwbobbypinsboardwalk.blogspot.com/2010/05/featured-attractions-from-10th.html
Great use of that box! I have to keep that in mind.
ReplyDeleteI have a ton of those saved toy boxes! What a fabulous idea! It turned out great. Such an inspiration...I'll definitely be keeping this in mind - genius! Thanks so much for joining The Sunday Showcase Party. I greatly appreciate it! Hope you are enjoying your week! ~ Stephanie Lynn
ReplyDeleteHi Rebecca! Just wanted to let you know I'll be featuring your subway art today! Stop by and grab a featured button if you like! Thanks again for linking to The Sunday Showcase Party! ~ Stephanie Lynn
ReplyDeleteSuper cute! I'd love for you to link this up at Sundae Scoop tomorrow. http://iheartnaptime.blogspot.com/
ReplyDeleteI meant to say I'd love to feature this...it's been a long day! Hope that's okay! It will be featured tomorrow!
ReplyDeleteRebecca, You my darling have won our Frugalicious Friday giveaway ($100 gift certificate) to Fatsy Facade! Congratulations! Please e-mail susan at susan@fantsyfacade.com
ReplyDeleteJane
Finding Fabulous
I think I have that same crate! What a great idea!
ReplyDeletei love it! i want to make a subway art sign for our hall, but the thought of cutting out all those letters was a bit daunting. i'm totally going to use this method. thanks for sharing!
ReplyDeleteSo so cute!! I love the color that you used and the stain over the top. Very nice!
ReplyDeleteThanks so much for linking up to my subway art party!
XOXO
Jen